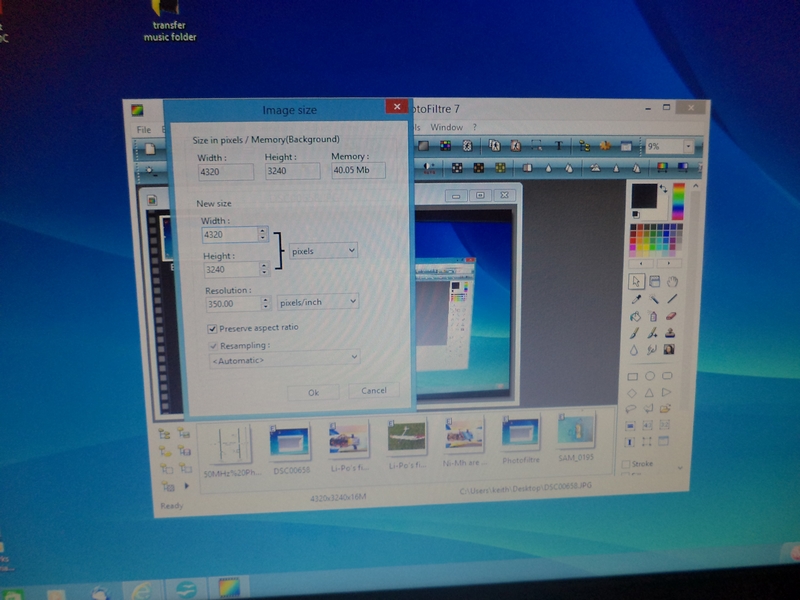
Drag the first photo you want to re-size into the grey area in the middle of the window.
1/ Looking at the top bar click on “Image”
2/ look down the drop down list and click “Image Size”
3/ Generally the width of your photo will be greater than its height but which ever is the greatest number place the curser at the end of that number and using the 'back' key remove the number and enter 800. (The number for the other dimention will change automatically.) Click on "OK"
In the next picture you'll see the picture that I want to re-size is originally '4320' pixells in size.

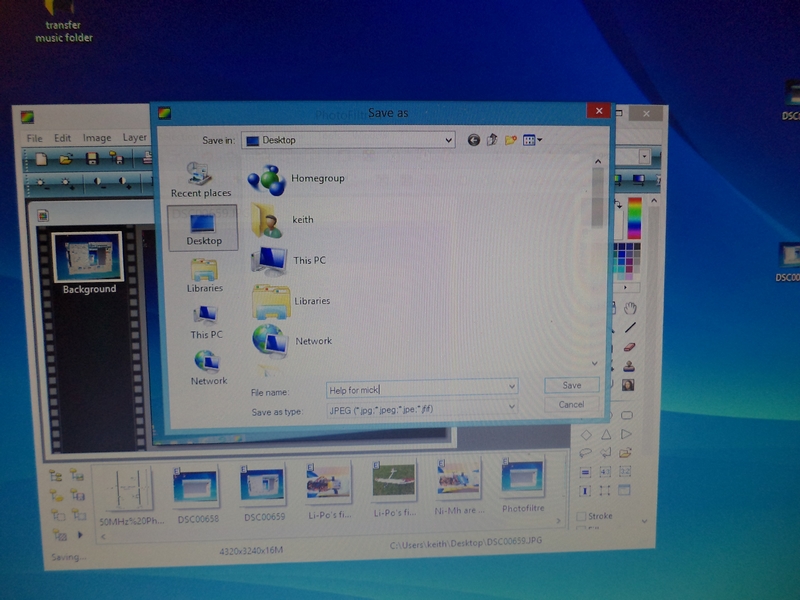
3/Having reduced the size of the picture click on the “File” button on the top bar. From the drop down menu click on “Save as”
4/Give your reduced picture a name if you want to in the shaded box below, and tell the pc where you want the reduced picture to be sent to (normally 'Desktop') in the top area of the window.

5/ Click on 'Save'
A “quality” or “compression” window will open, don't worry too much about this. Click on “Standard” quality.
After a moment your new, re-sized picture will appear on your 'desktop' ( or whatever file you've told your reduced picture to go in instruction 4 above.
Make sure your reduced pictures don't have the same name as the original pictures. If they have then re-name them
Now all you need to do to upload them onto this forum is to........
6/ Hit the “Download image from your PC” button on the forum
7/ Click on the “Browse” button that will open in the small window, then select the name of the picture, (now in its reduced size) and...............
8/ Click the “Submit” button.
After a few moments the picture will be uploaded. If you click on the “Preview” button you'll get a chance to see the fruits of all your (and mine Ha!) efforts. Well done Mick, take a bow and go and have a coffee,.....you desirve it! :clap: